Hi, it's Beth and today I have a Halloween Boo Banner!
I'm can't say I love Halloween, but don't get me wrong, I love candy! I just don't love spiders, scary stuff or gory stuff. But candy, bring it on!
This is easy and cute, and you could make it as wide as you like, if Boo is too short for you.
Here is how to make this Halloween Boo Banner:
1. Die cut and emboss burlap paper (or use the Burlap Background stamp!), orange and black papers, and patterned papers. I made 5 sets of Banner {die}tails banners and the {die}namic Duo black die cuts, 2 of the orange.
2. I inked the edges of all the die cuts, using the sponge piece. Before inking the patterned papers, I sanded the embossed detail to give it a more distressed look, that really adds a lot to the project!
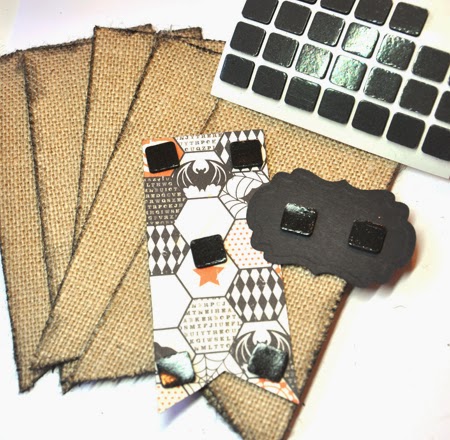
3. Assemble the pieces with 3D Foam Squares, they stick to anything and add dimension. I used them on each die cut layer. Add the Banner, then the Die-namic Duo.
4. I stamped the orange pieces with "Happy Halloween" and "I'm just here for the candy" from the Halloween Greetings stamp set.
5. I added Black Pear Pins (love these!) to each banner piece, then attached them to jute cord. I tied ribbon around each pin to play off the rough burlap texture.
See, isn't that easy? Here is the other end piece, no need to tilt your head.
You can find me at my blog, Cookies for Breakfast.
Beth
I used these supplies:
Scrapbook Adhesives by 3L®: 3D Foam Squares Regular, Black
American Crafts: Thickers - Platforms chipboard letters
Die Cuts with a View: The Burlap Paper Stack
Authentique: Frenzy patterned paper
Clearsnap: Colorbox Mix'd Media black ink
Stash: Jute, orange and black cardstock
Follow A Jillian Vance Design here:
I'm can't say I love Halloween, but don't get me wrong, I love candy! I just don't love spiders, scary stuff or gory stuff. But candy, bring it on!
This is easy and cute, and you could make it as wide as you like, if Boo is too short for you.
Here is how to make this Halloween Boo Banner:
1. Die cut and emboss burlap paper (or use the Burlap Background stamp!), orange and black papers, and patterned papers. I made 5 sets of Banner {die}tails banners and the {die}namic Duo black die cuts, 2 of the orange.
2. I inked the edges of all the die cuts, using the sponge piece. Before inking the patterned papers, I sanded the embossed detail to give it a more distressed look, that really adds a lot to the project!
3. Assemble the pieces with 3D Foam Squares, they stick to anything and add dimension. I used them on each die cut layer. Add the Banner, then the Die-namic Duo.
4. I stamped the orange pieces with "Happy Halloween" and "I'm just here for the candy" from the Halloween Greetings stamp set.
5. I added Black Pear Pins (love these!) to each banner piece, then attached them to jute cord. I tied ribbon around each pin to play off the rough burlap texture.
See, isn't that easy? Here is the other end piece, no need to tilt your head.
You can find me at my blog, Cookies for Breakfast.
Beth
I used these supplies:
 |
| Banner {die}tails Nested Die Set |
 |
| {die}namic Duo Die Set |
 |
| Halloween Greetings Stamp Set |
 |
| Black Pear Pins |
Scrapbook Adhesives by 3L®: 3D Foam Squares Regular, Black
American Crafts: Thickers - Platforms chipboard letters
Die Cuts with a View: The Burlap Paper Stack
Authentique: Frenzy patterned paper
Clearsnap: Colorbox Mix'd Media black ink
Stash: Jute, orange and black cardstock
Follow A Jillian Vance Design here:


2 comments:
Oh so pretty!
Thank You Celeste! Beth
Post a Comment