Thursday, October 31, 2019

Happy Halloween


Good morning! Ardyth here with a simple, spooky Halloween card. 

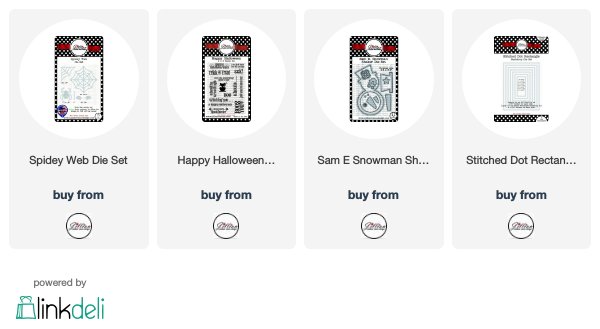
I started by cutting the circle from Sam E Snowman from a full-back sticky note to create both a positive and a negative circle mask. I placed the positive mask down on some white cardstock, and then I used post it tape to mask off the bottom of the panel. I blended grey ink over the top end of the panel and then removed the post it tape mask and the circle mask.

Next, I put the negative mask in place and blended pale green ink into it. I cut the full web from Spidey Web and used it as a stencil and blended darker ink over it. Then I removed the negative mask and stamped the sentiment from Happy Halloween along the line where the grey ink ended.  I trimmed the panel with the largest Stitched Dot Rectangle die.

To finish the card, I cut the spider from black cardstock and popped him up. 


A Jillian Vance Design products used:

Follow A Jillian Vance Design on:

Wednesday, October 30, 2019

a halloween spider...

Hello and happy day before Halloween!  Rosemary here on the blog today and I thought since tomorrow is Halloween I would finally post a Halloween card.  This one uses the new Instant Photo Frame 2.0 die set, the Spidey Web die set and a sentiment from the Happy Halloween stamp set.


This design is super simple.  I die cut some white cardstock with the largest Stitched Dot rectangle die and adhered it to a light gray cardstock base.  I then die cut the largest instant photo frame from additional light gray cardstock.  The corner spider web and the spider's little string that he/she is hanging from were die cut from silver cardstock and the spider from black.  To add a bit of color I decided to go with a purple background for my spider and web.  I die cut the large photo frame from purple cardstock and adhered the frame part to the light gray frame.  The sentiment was stamped and then the frame was adhered to the card front.  I die cut the little bat into the purple square, lifted up his wings a bit and then adhered the panel inside the frame.  The corner web and string were adhered with Just Glue It adhesive and then I popped up the spider with foam tape.  I want to let you know that there is a mini release happening on Friday, November 1st.  See the graphic below for all the details:


A Jillian Vance Design products used:


Thanks for stopping by and happy Halloween!

Rosemary 

Follow A Jillian Vance Design on:

Tuesday, October 29, 2019

Jack O Lantern


Hi there it's Tracey here today with one more spooky Halloween card! I created my pumpkin using the Autumn Pumpkins stamp set by clear embossing the large pumpkin image on watercolour cardstock and then colouring the pumpkin and the wine with Distress Inks. The pumpkin was fussy cut and set aside to dry.

To prepare my background I ink blended some Distress Oxide inks onto a panel of Bristol Smooth cardstock. I used Wilted Violet, Blueprint Sketch, Chipped Sapphire and Black Soot! Once it had my blending done I covered the whole panel with Nuvo Glimmer Paste in Moonstone. The panel was set aside to dry. The glimmer paste over the background picked the most gorgeous iridescent colours, perfect for Halloween!

The sentiment from the Happy Halloween stamp set was white embossed onto a small sentiment strip from the Instant Photo Frame die set that I die cut with yellow cardstock. Once the pumpkin was dry I fussy cut it and then I die cut the pumpkin face from the Perfect Pumpkin die set with black cardstock.  To finish it off I glued the face on to my pumpkin with A Jillian Vance Design Just Glue It crystal clear adhesive. The pumpkin was adhered to the background with foam tape to give it a bit of dimension!

A closer look...


Thanks for stopping by today and Happy Halloween!


Follow A Jillian Vance Design on:

Monday, October 28, 2019

Pink Poinsettia

Happy Monday!
Today I decided to do a card using a blush pink Poinsettia.
Jillian and I had a great card class at Christy's Main Street Memories in New Concord, Ohio and one of the cards Jillian designed had a pink poinsettia so I decided I needed a soft non-traditional Christmas card for today!


The Poinsettia has stitching lines which if folded on those, you can create dimension for your flower! Easy peasy to layer with all sizes included in the set and put together with Just Glue it!
I used the cozy Knit Stitch cover plate in White for a soft look as to not over power the flower. Sentiment is from Christmas Blessings stamped in It's A Girl Catherine Pooler Ink!
An easy card that could be mass produced for your Christmas card list this year!


Be sure and join us on Friday for the Winter Coffee Lovers Blog Hop with Shelly 
AND our Mini "Coffee Talk" Release!

A Jillian Vance Design products used:

Winners from the WOW! EMbossing Powder and AJVD blog hop are as follows:
WOW! $25 winner: Denise Bryant
AJVD $25 Winner:  Kathy Dippner 
Please email Jillian at jillian@jillianvance.com to claim your prizes!


Have a blessed week!

Follow A Jillian Vance Design on:

Friday, October 25, 2019

PUMPKIN

Hey y'all! Shelly, here.
Happy Friday!

Today, I'm swinging in to share a fun and simple Fall themed card with you.


I started my card by stamping on the pumpkins in black ink. After, I simply colored them with markers. Easy peasy, right?!...Once having my pumpkins colored, I then used the Headline Type Alphabet dies to spell 'PUMPKIN'. I layered the letters three times, using two layers of orange cardstock and the third layer using green cardstock. To finish my card off, I added the die cut letters to my colored panel. Simple, yeah?!...

Thanks so much for stopping by!
Enjoy your day!


Follow A Jillian Vance Design on:

Thursday, October 24, 2019

Colorful Plaid Joy


Good morning! Ardyth here with a fun way to use the Stitched Plaid Cover Plate - colour it!

I started by cutting the cover plate from white cardstock. Then I used Copic markers to colour the red and green stripes, and I didn't worry about keeping the edges clean - I just covered them with a very dark gray Copic marker.

To finish the card, I used the smallest Stitched Dot Rectangle as a sentiment strip and put JOY from the Headline Alphabet set on top, letting the letters over hang a bit. I coated the letters with Stickles for some sparkle.

A Jillian Vance Design products used:


Follow A Jillian Vance Design on:

Wednesday, October 23, 2019

a leafy hello...

Hey there!  Rosemary here today with another fall card.   I just love fall and all the beautiful leaves falling to the ground that making them is so easy to do!  Today's card was inspired by a card idea I saw over the weekend.  That card featured ink blending, but I decided to use up distress inks that I had on my work surface from another card I had been working on.  I used the maple leaf and oak leaf dies from the Grand Leaf Trio die set, as well as the Grande Greetings Hello die.


As I stated above I used some watercolor paper and smooshed the paper into the distress inks that I had sprayed liberally with water.  My colors ended up a bit muddy, but I decided that I liked the colors of the panels and then added a bit more brown to the panels so that I ended up with leaves that look like the ones that have been off the tree for a few weeks... the ones that have a weathered look.  After die cutting them I added some splatters of red spray mist that I had on hand to give them an even more weathered look.  Off white cardstock was die cut with the largest Stitched Dot rectangle die and then I arranged the leaves.  The oak leaves were adhered flush to the panel and the maple leaves were popped up with foam tape.  I die cut the Grande Hello from brown glitter cardstock once and twice more from scrap cardstock and then adhered them together.  That was adhered with glue and then I attached my panel to a kraft cardstock base.   Adding this to the Simon Says Stamp Wednesday challenge.

Don't forget about the WOW!/A Jillian Vance Design blog hop that is going on right now.  You have until Monday to leave a comment for a chance to win one of 2 gift certificates.  One to AJVD and one to WOW!  Click here for all the details.

A Jillian Vance Design products used:


Thanks for stopping by and have a great day!

Rosemary

Follow A Jillian Vance Design on: